
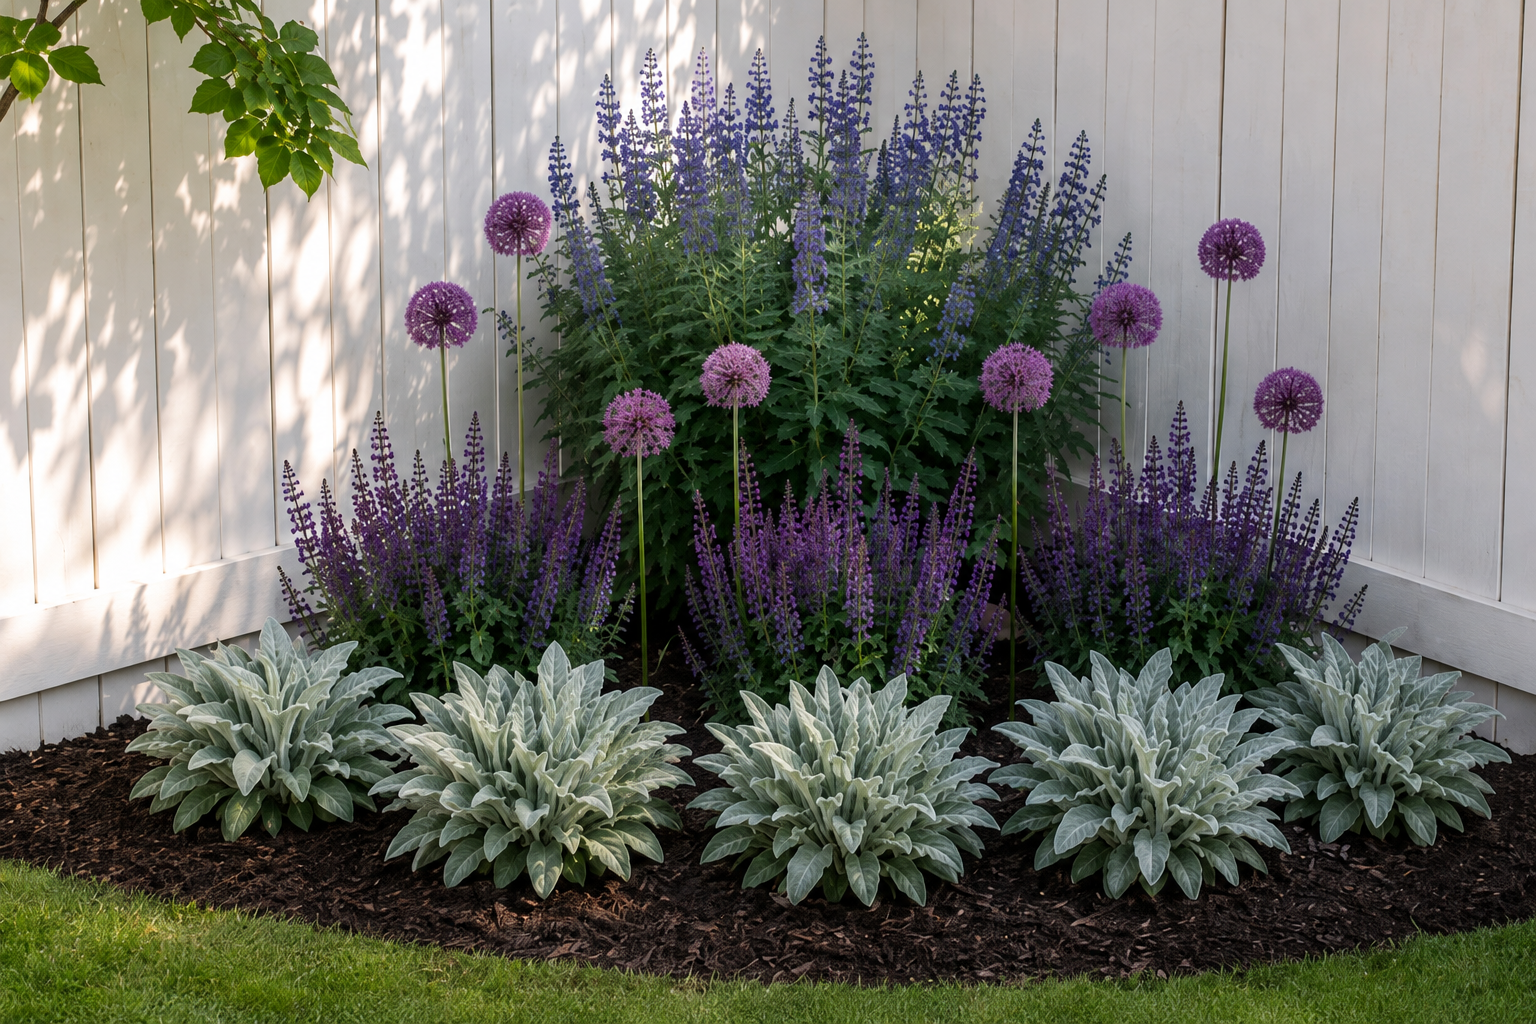
When an entire yard feels too big to tackle, a corner gives you a clear starting point. The boundaries are already visible, the project stays manageable and even a modest planting can make the space feel noticeably more finished.
A corner garden can soften two hard lines, frame a view from a window or turn an empty patch beside a fence, porch or patio into a welcoming focal point.
Why a corner is so beginner-friendly
Clear boundaries
The meeting walls, fences or edges help define the bed before you begin.
Natural depth
The corner creates room for tall, medium and low plants in a compact footprint.
Visible results
A small finished garden can change the feeling of an entire part of the yard.
Measure before choosing plants
Measure outward from the corner along both sides, then note the deepest point of the bed. A 6 × 6-foot corner, for example, is large enough to create distinct layers but still small enough to plant and maintain comfortably.
Also photograph the area and record its sunlight. A bed beside a fence may receive direct sun for only part of the day, while a corner against the house may be affected by reflected heat or roof runoff.
Keep mature size in mind: do not choose plants by their nursery-pot size. University of Minnesota Extension recommends measuring the plantable space and allowing enough room for every plant to reach its mature size.
Use a simple three-layer layout
- Place the tallest plants near the back. Use one strong anchor or a repeated group where the two sides meet.
- Fill the middle with flowers and texture. Repeating two or three varieties creates rhythm without making the bed feel crowded.
- Soften the front edge. Lower plants make the transition from lawn, gravel or paving feel gentle and intentional.
Leave breathing room around each plant. The bed may look sparse on planting day, but correct spacing prevents crowding and allows the planned shape to emerge as the plants mature.
Choose fewer varieties and repeat them
A small bed usually looks more polished when the plant list is restrained. Instead of buying one plant of every color, select a simple palette and repeat each variety in groups. Different heights, leaf textures and flower shapes will provide interest even when the colors are related.
Purple flowers with silver and green foliage are one example: vertical spires add height, round allium blooms provide contrast and soft silver leaves create a calm edge.
Put the right plant in the right corner
Before purchasing, compare your site with each plant’s needs: sunlight, soil moisture, drainage, mature width and USDA hardiness zone. Matching plants to the actual conditions reduces stress and replacement costs. See the University of Minnesota Extension’s planning guidance.
Give the bed a finished shape
A gentle curve across the front usually feels softer than a straight diagonal line. Mark the edge first with a garden hose, rope or marking paint, then step back and view it from the places where you will see it most often. Adjust the curve before digging.
Once planted, add mulch to visually unite the bed, retain moisture and reduce weeds. Keep mulch away from plant crowns and stems rather than piling it against them.
Start small without thinking small
A corner garden can stand beautifully on its own, or become the first piece of a larger landscape later. Beginning with one manageable area lets you learn what thrives in your yard, discover the style you enjoy and finish something lovely before moving on.
Ready for a corner you can plant?
My 6 × 6-foot Deer-Resistant Corner Garden includes a measured layout, complete plant list and finished-garden visualization for part-sun spaces in USDA Zones 5–8.